


Personalized products convert higher, feel premium, and create repeat buyers.
This guide shows you exactly how to add personalization to your Shopify store, how to make the preview look like the final product, and how to get clean files to production without chaos.
TL;DR
- Personalization on Shopify means inputs on the product page + a live preview + clean order data that flows to production.
- Use an app like Bespo to launch fast, show a realistic preview, validate inputs, and export production-ready files.
- Offer customers techniques like Print Text, Print Image, Monogram, Engraving, Embroidery, and Embossing or Debossing.
- Add guardrails like character limits and pricing rules.
- Always test the handoff from cart to fulfillment before you scale.
Quick definition of product personalization
Product personalization on Shopify is when a shopper customizes a product with text, images, or options, and those choices are saved to the order and used to create the final item. Typical inputs include text fields, monogram pickers, image uploads, color or size choices, font selectors, and placement options.
What does personalization mean on Shopify and what techniques are supported?
Personalization covers any on-page change a buyer makes to customize the product. The most common techniques are:


Each technique has different preview needs, file requirements, and production checks.
Your job is to collect the right inputs, show a trustworthy preview, and pass clean data to fulfillment.
How to add personalization to Shopify in 5 steps
1. Pick your technique and inputs
- Decide if you need text, image upload, monogram, or a mix.
- Map each input to what production needs. (For example, initials, font, placement, thread or foil color.)
2. Install a personalization app and add fields
- Use a plug-and-play app to add fields without custom code.
- Create your input rules now: character limits, allowed characters, line breaks, image size, pricing, and required fields.
3. Enable a live preview that matches the final product
- Use layered assets and real fonts.
- For metals and leather, add highlight and shadow layers so the preview looks like real engraving or embossing.
- For embroidery, simulate stitch density and thread colors.
4. Connect order data to fulfillment
- Store inputs as line item properties and meta fields.
- Export or attach the production-ready file type your team needs, such as PDF, SVG, or high-resolution JPG.
- Confirm the order view shows every detail clearly.
5. QA the full journey
- Place real test orders for each technique.
- Try edge cases such as long names, special characters, or very small items.
- Confirm that the preview, the cart, the order, and the exported files all match.
Will my preview match the final product?
It will when you treat the preview like a miniature production process and use Bespo to:
- Use the exact font files and kerning that production uses.
- For engraving or embossing, so that the text appears pressed or raised.
- For embroidery, simulate stitch paths.
- For print, show real-scale mockups.
Fast setup with short clips
Below are technique quick-starts you can use to offer your customers personalization.
Each section includes a short definition, when to use it, a setup checklist, a realism tip, and a short clip.
Print Text Customization on Shopify: Quick start
When to use
Names, dates, short messages, simple fonts.
Setup
- Add a Text input with a character limit.
- Let buyers choose font, color, and placement if needed.
- Map inputs to the live preview layer and to order data.
- Add a price rule if extra placements cost more.
Realism tip
Match preview resolution to your product photo and use the real font file at true size.
Print Image on Shopify: quick start
When to use
Photo gifts, posters, canvas, apparel with uploaded artwork.
Setup
- Add an Image upload input with file type and size checks.
- Limit to JPG or PNG and set a minimum width in pixels.
- Add a cropping or fit rule.
- Store the full-res file and include a link for production in the order.
Realism tip
Preview should show real crop boundaries and resolution warnings for low-quality images.
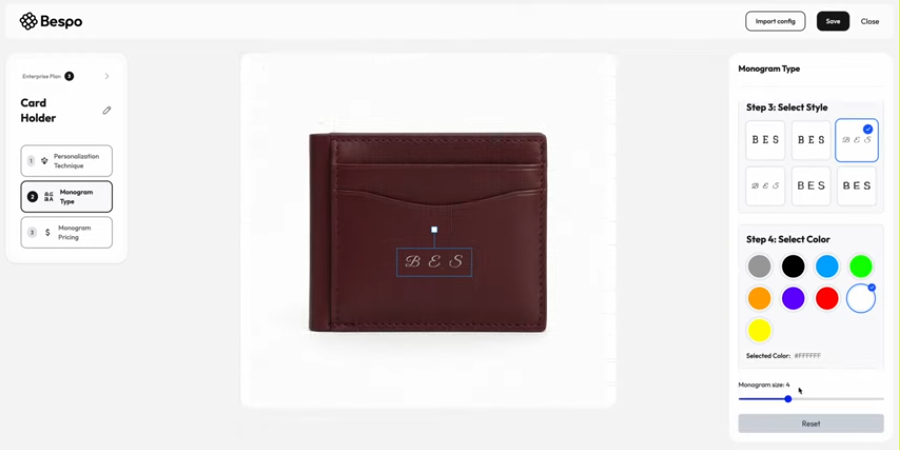
Offering monogram options on Shopify
When to use
1–3 initials on jewelry, leather, travel goods, or linens.
Setup
- Add a Monogram input that restricts to 1–3 characters.
- Allowlist A–Z and numerals if needed. Disallow emojis and special symbols.
- Add fixed letter spacing presets and casing rules.
- Give buyers a small set of approved monogram fonts.
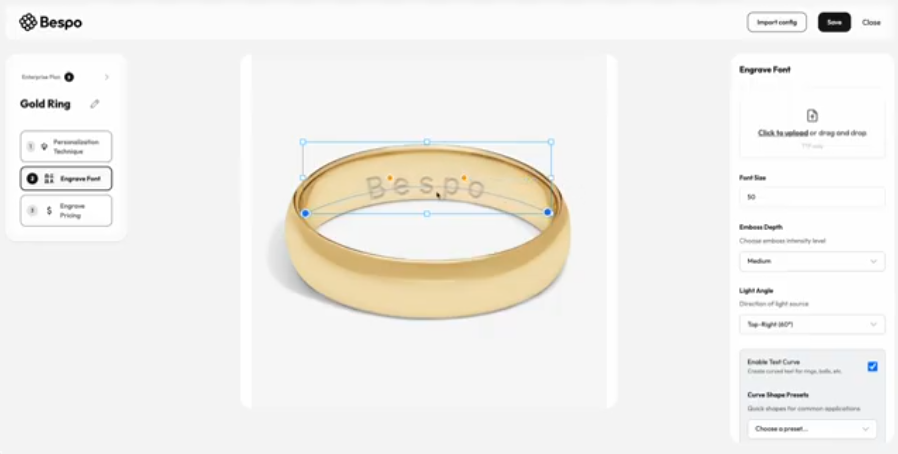
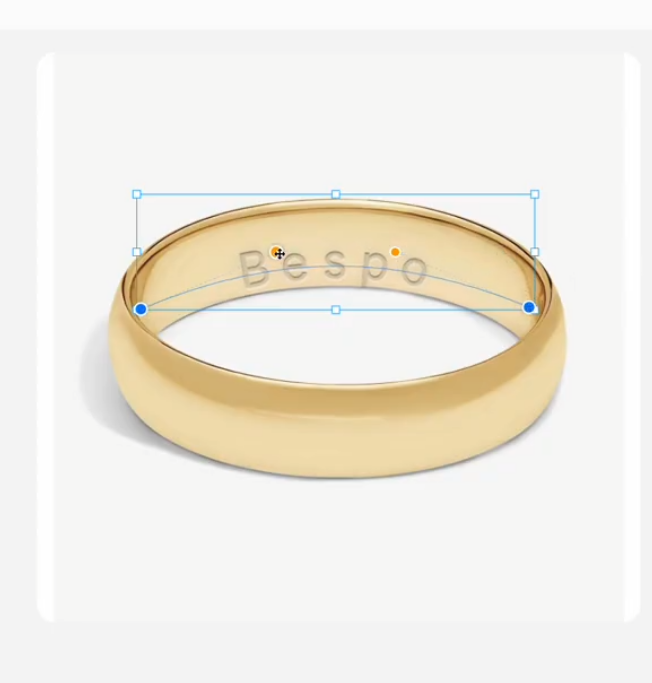
Adding engraving options on Shopify
When to use
Rings, necklaces, bracelets, charms, watches, wood gifts.
Setup
- Add a Text input with a strict character limit based on size.
- Provide a small set of engraving-safe fonts.
- Place the engraving area precisely on the product image.
Realism tip
Use a light overlay for highlights and a soft shadow for depth.
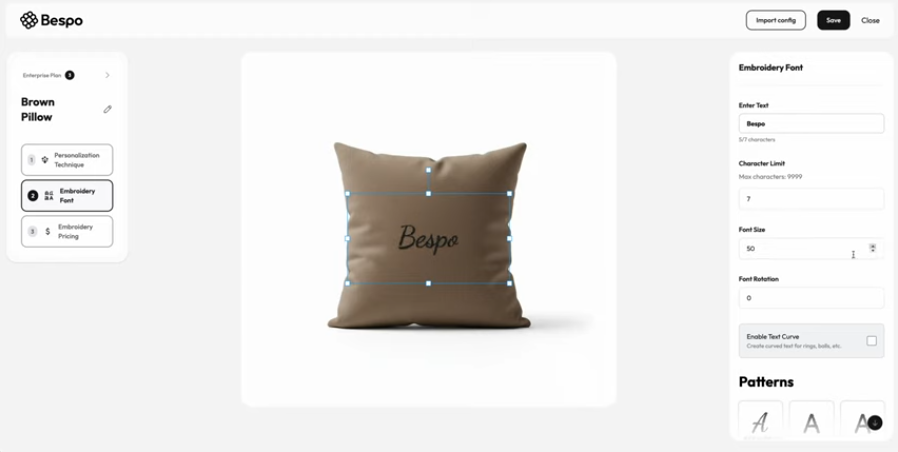
Embroidery on Shopify: quick start
When to use
Hats, polos, hoodies, uniforms, bags, towels, patches.
Setup
- Add Text or Upload inputs.
- Offer approved thread colors and block gradients.
- Set minimum font sizes and disallow hairline strokes.
Realism tip
Simulate stitch density in the preview with subtle texture.
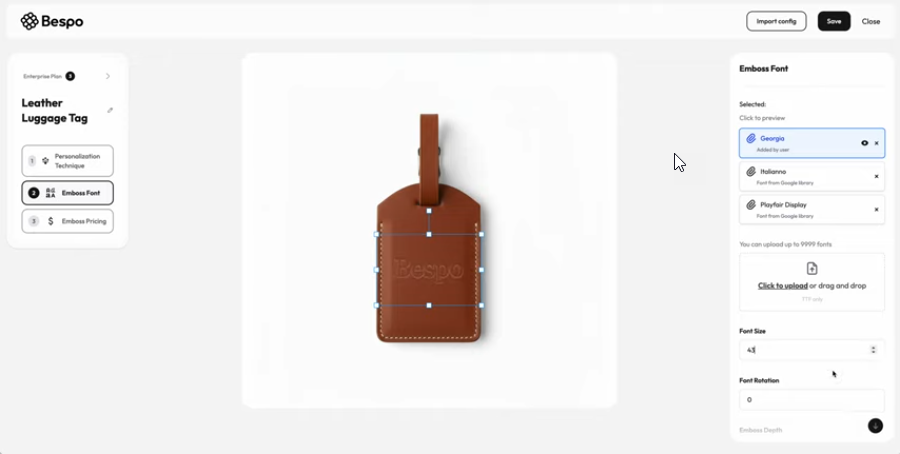
Offering embossing or debossing on Shopify
When to use
Leather goods such as belts, bags, wallets, and luggage tags.
Setup
- Add a Text input.
- Offer embossing depth options.
Realism tip
Add a directional light highlight and a soft shadow to simulate depth and texture.
Which app can I use to personalize products?
The best app for premium brands that need photoreal previews and fast rollout is Bespo. Bespo offers
- Real-time photoreal previews across techniques.
- No custom code to launch.
- Exports production-ready files and maps inputs to orders.
- Designs for jewelry, apparel, and leather goods where realism matters.
Other tools teams often compare
- Zepto Product Personalizer: Broad input options and conditional logic.
- Teeinblue: Popular with POD merchants and template workflows.
- Customily: Strong focus on print-ready flows.
- Qstomizer: Flexible 2D designer with quick start templates.
If your brand lives or dies on how real the preview looks and how clean your handoff is, start with Bespo.
FAQ
Can I limit characters and block emojis for monograms or engraving?
Yes. Set a strict character limit. Common rules are A–Z uppercase, numerals, and spaces.
Will my preview match the final product?
Yes, if you use the real fonts, correct scale, and technique-specific layers.
How do files reach production?
Each input becomes order data and a production-ready file is attached or exported. Common formats are PDF, SVG, and high-res JPG. Add links in the order so your team or POD partner can download the exact file.
Glossary
- POD: Print on demand. A fulfillment model where items are produced after purchase.
- Embossing: Raised mark pressed into material.
- Debossing: Indented mark pressed into material.
