How to add and configure a product in Bespo Product Personalizer
This help document will show you how to add personalization to a product.
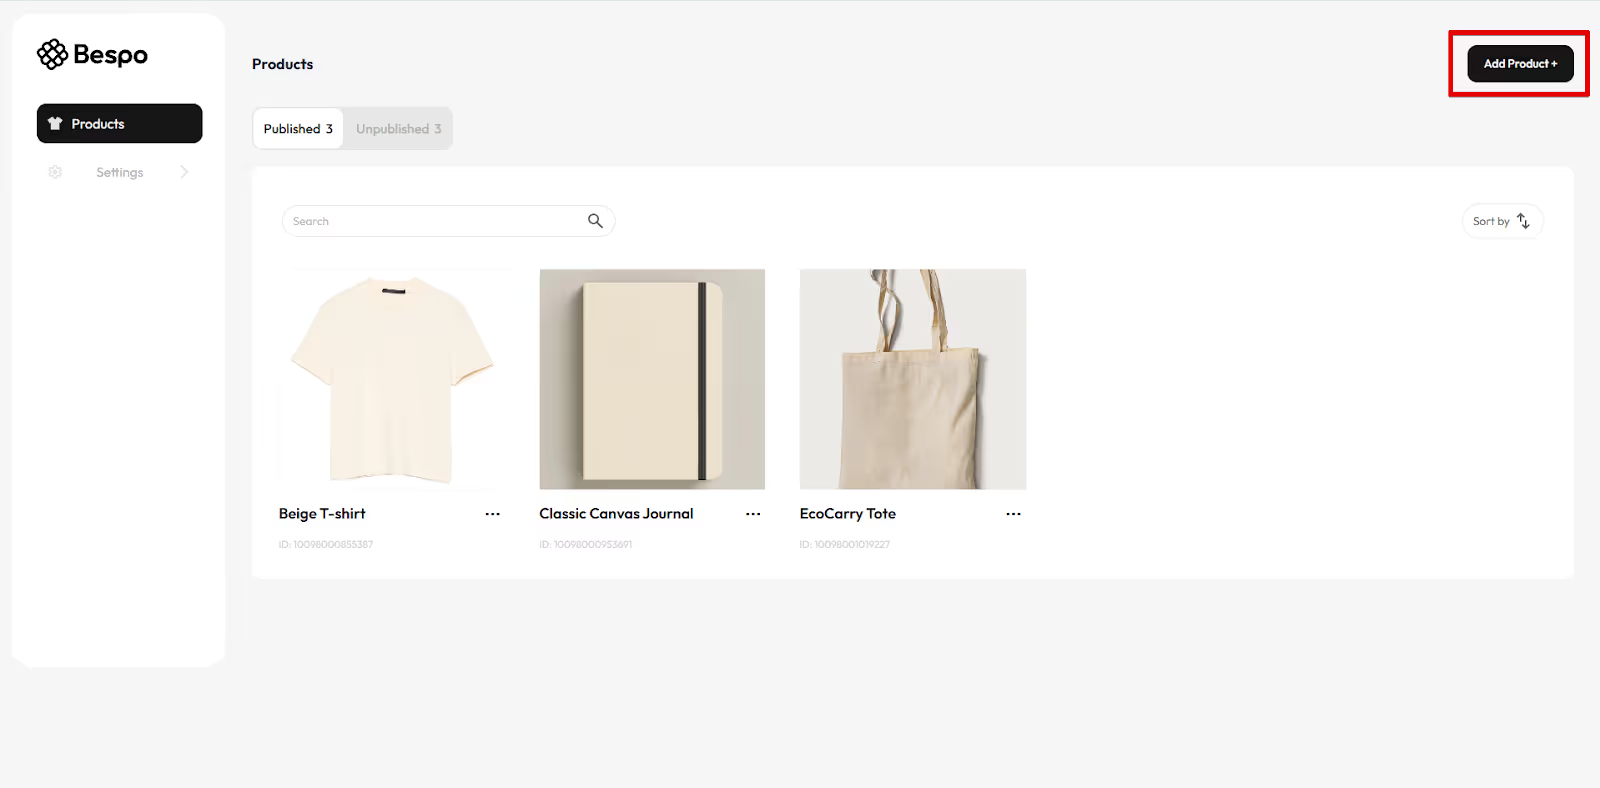
1) Click Add Product
Click Add Product + in the top right.
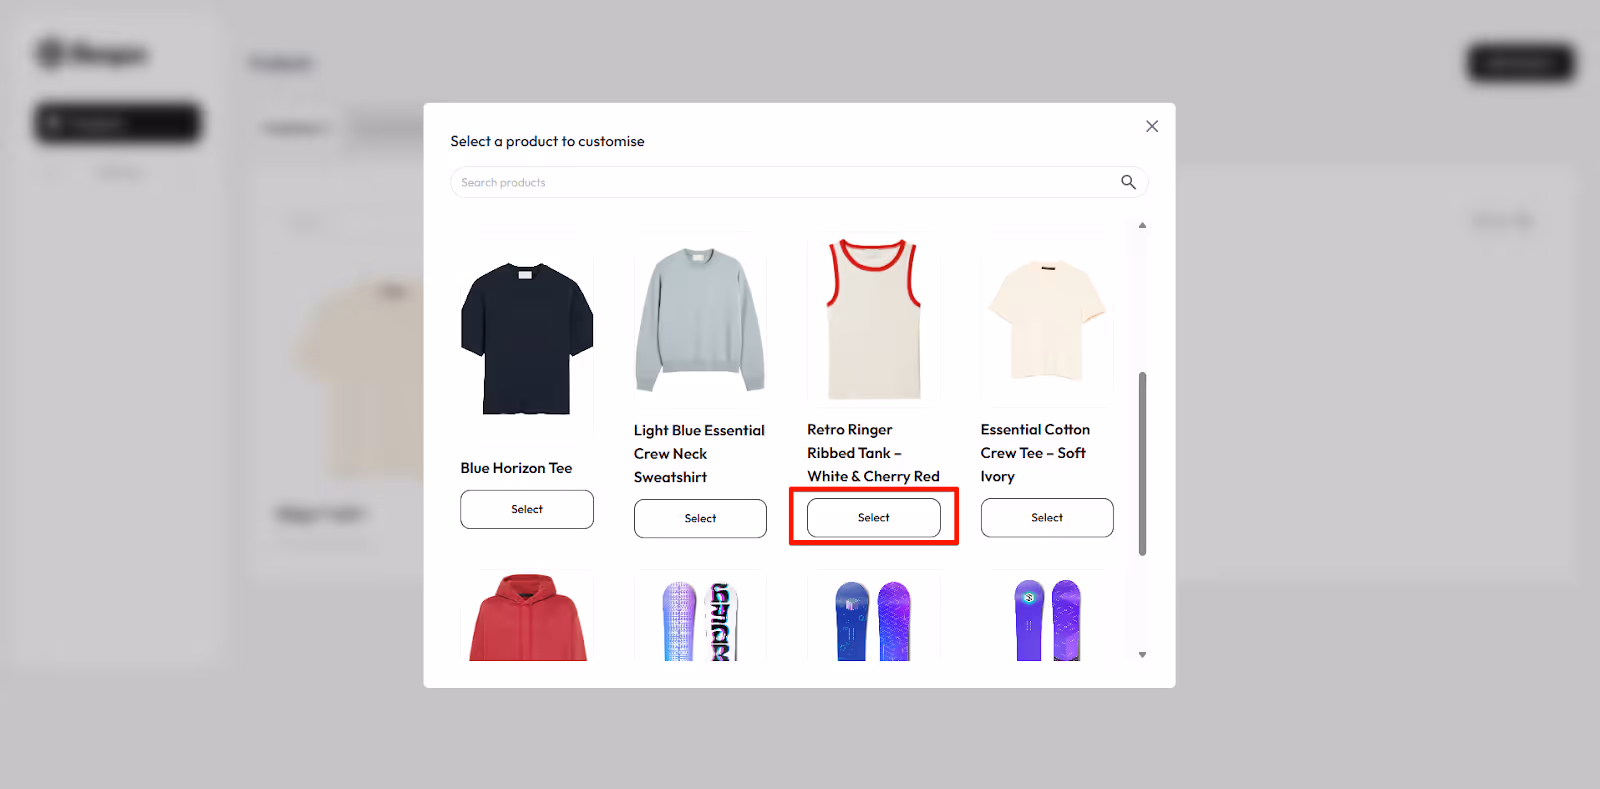
2) Choose the Product You Want to Let Customers Personalize
In the “Select a product to customise” popup, click Select on the item you want.
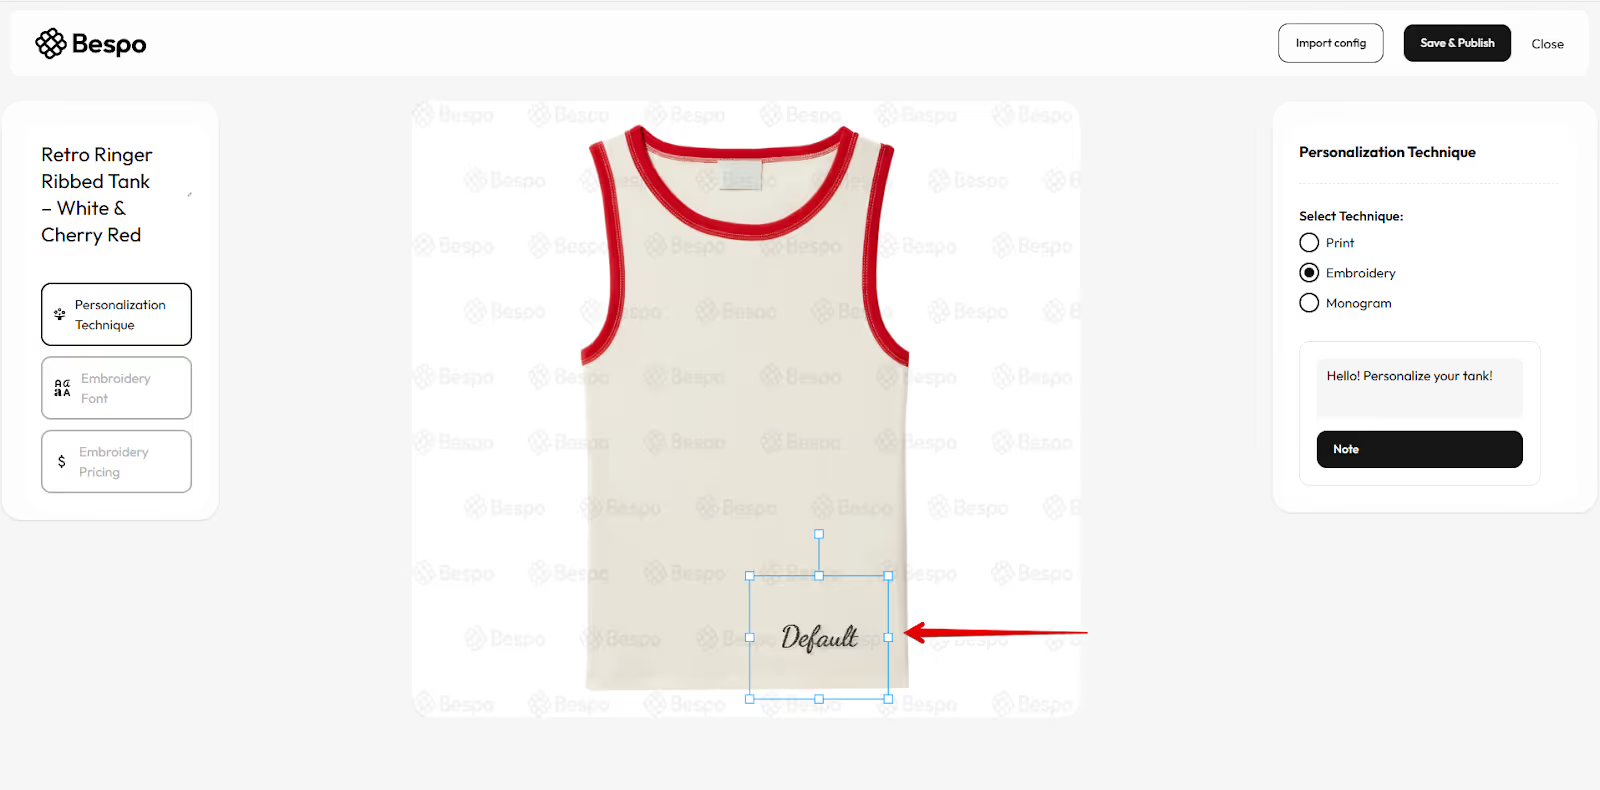
3) Choose Where the Personalization Will Go
Adjust the position of the personalization on your product by moving the canvas tool.
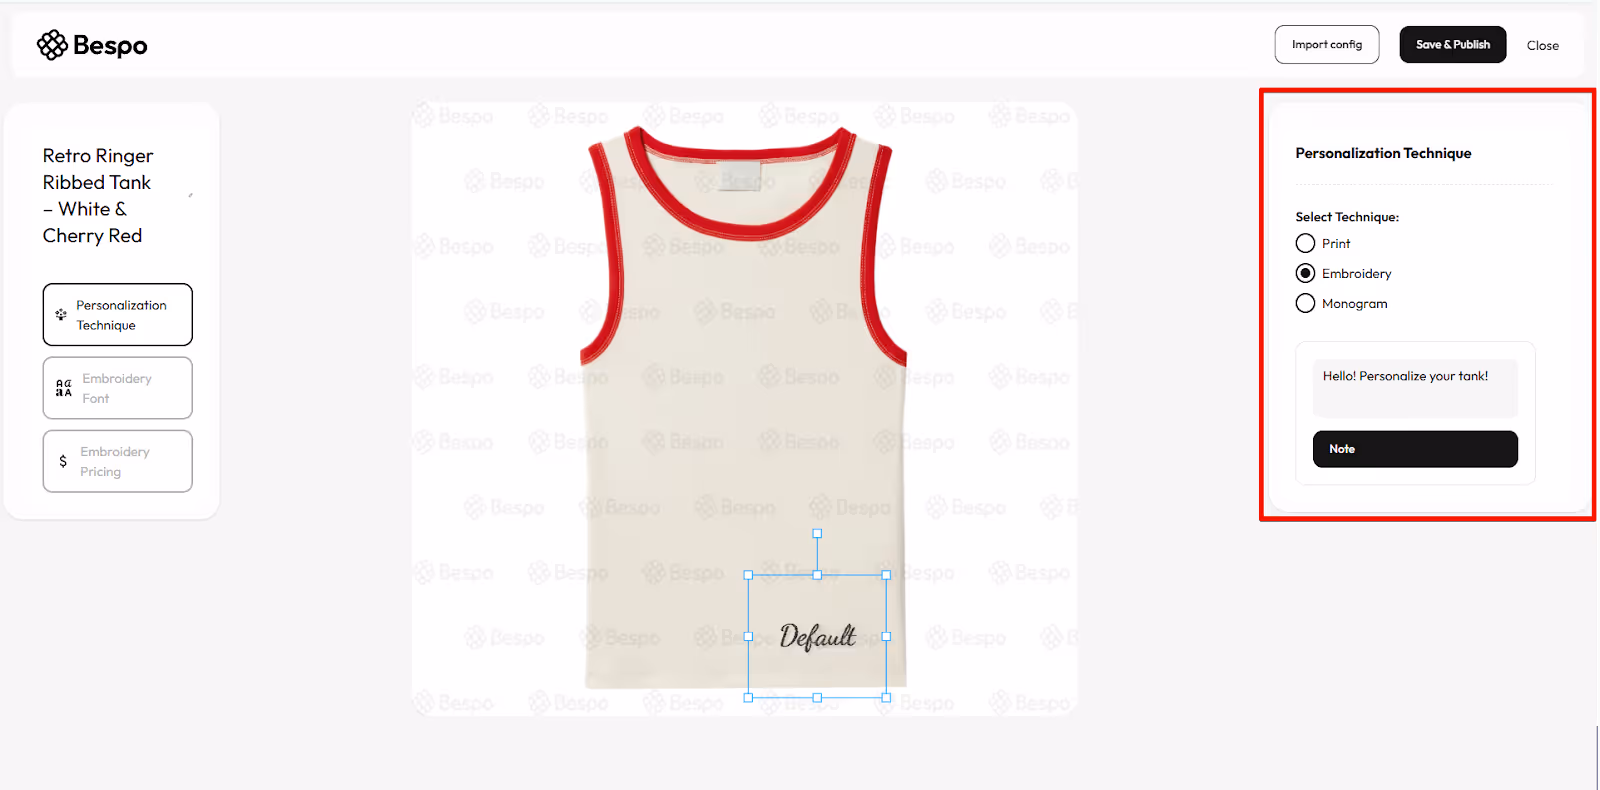
4) Pick a Personalization Technique
On the left, click Personalization Technique.
On the right, choose Print, Embroidery, or Monogram.
Type a short prompt in the note box if you want to guide the shopper.
5) Set the font and text limits
During this step, you can
Determine the type of font and color your customers can choose from.
Enter sample text so you can see the preview update.
Set Font Size.
Set a Character Limit so customers cannot exceed your stitch limits.
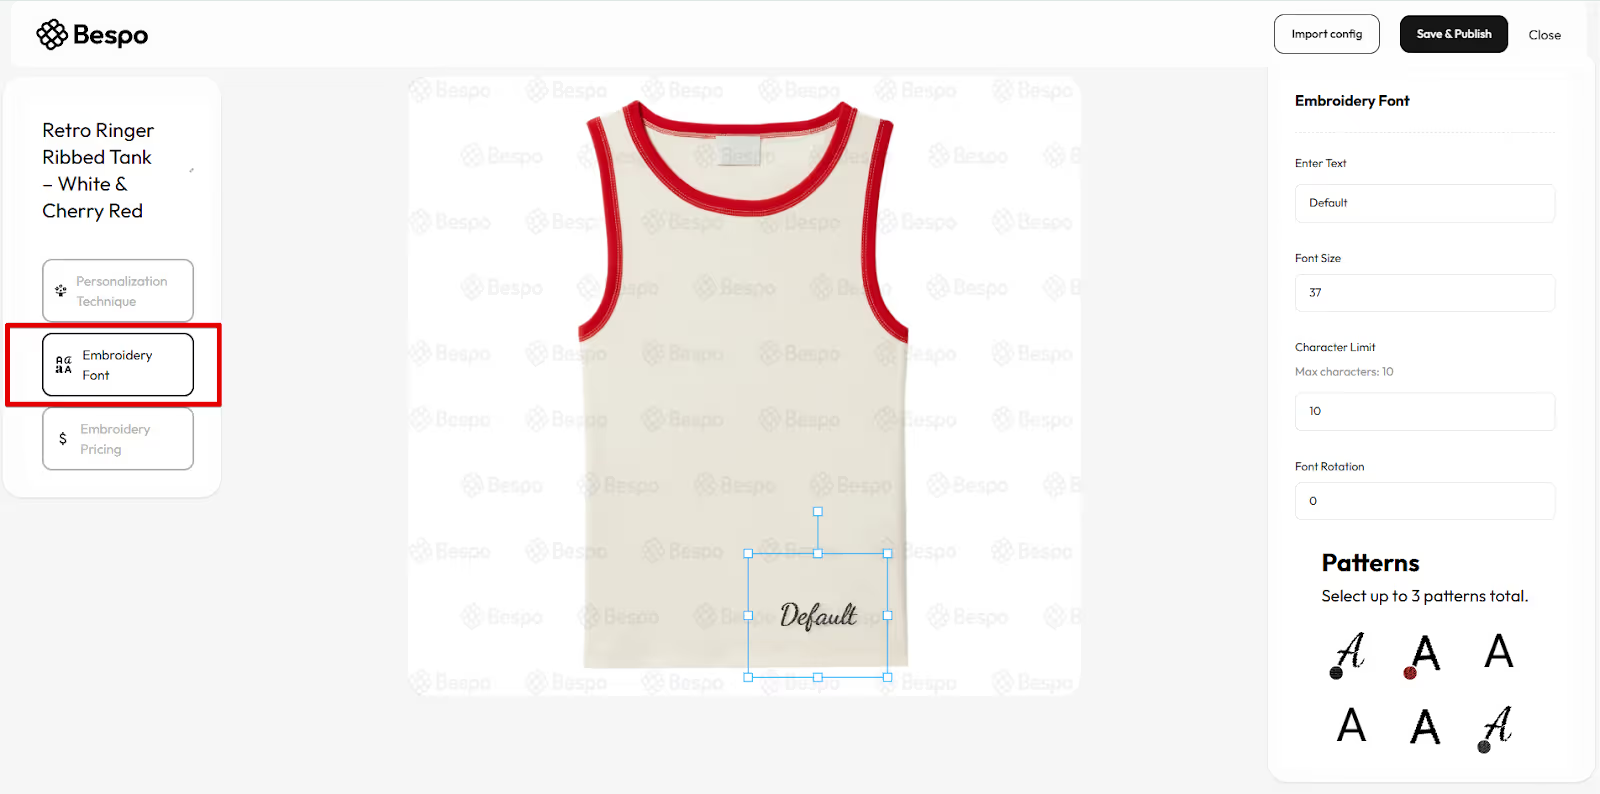
Note: The second option on the left-hand panel will be determined by the technique you choose in the previous step
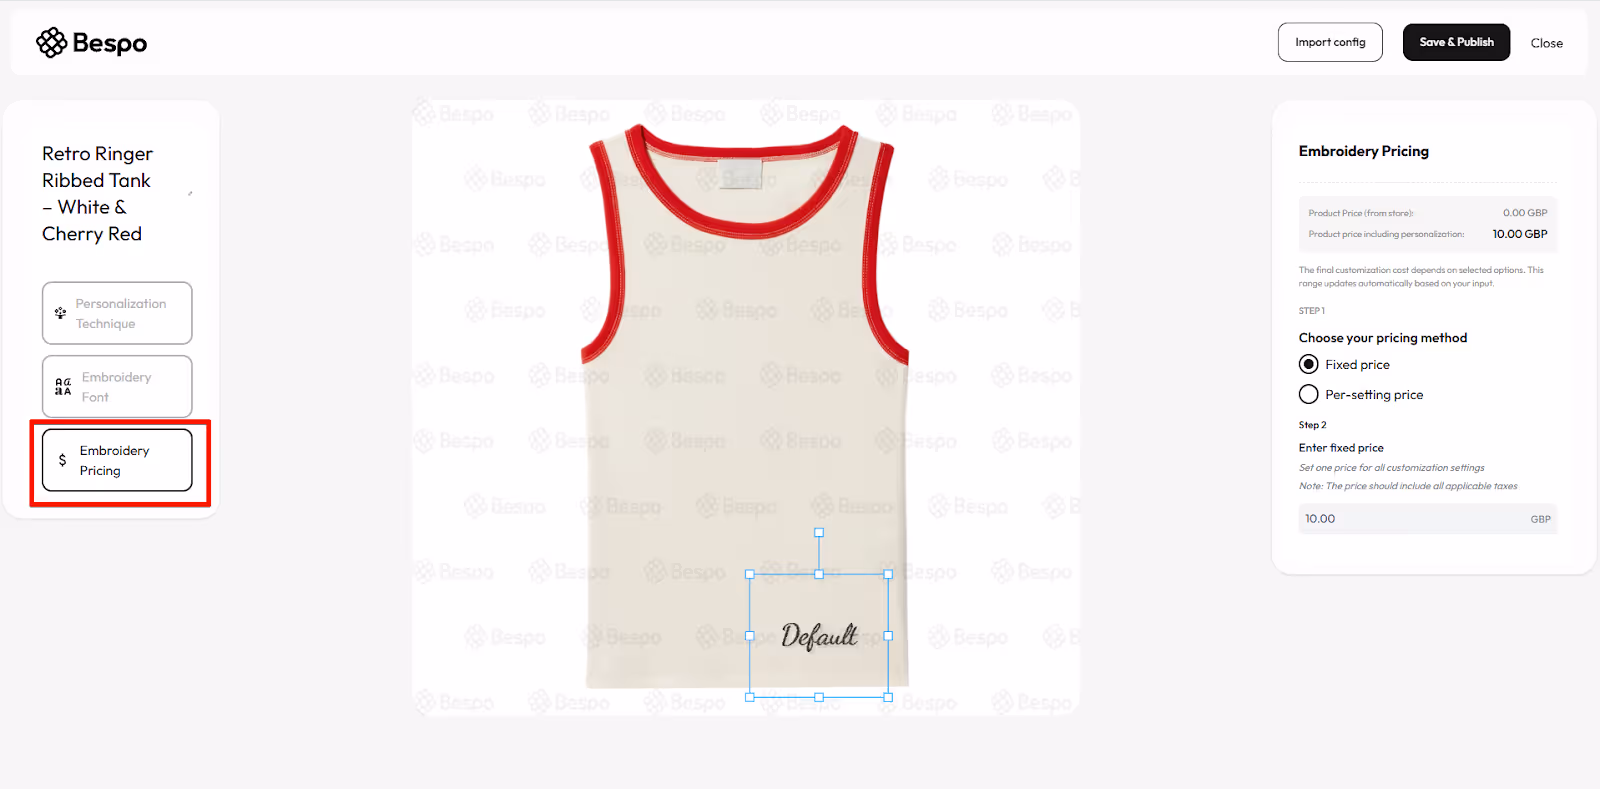
6) Set pricing
Click Pricing on the left.
Choose between Fixed and Per-setting pricing. Here’s the difference:
Fixed price if every personalization costs the same. Enter the amount.
Per-setting price if price varies by font, color, or another setting. Enter the amount beside each setting.
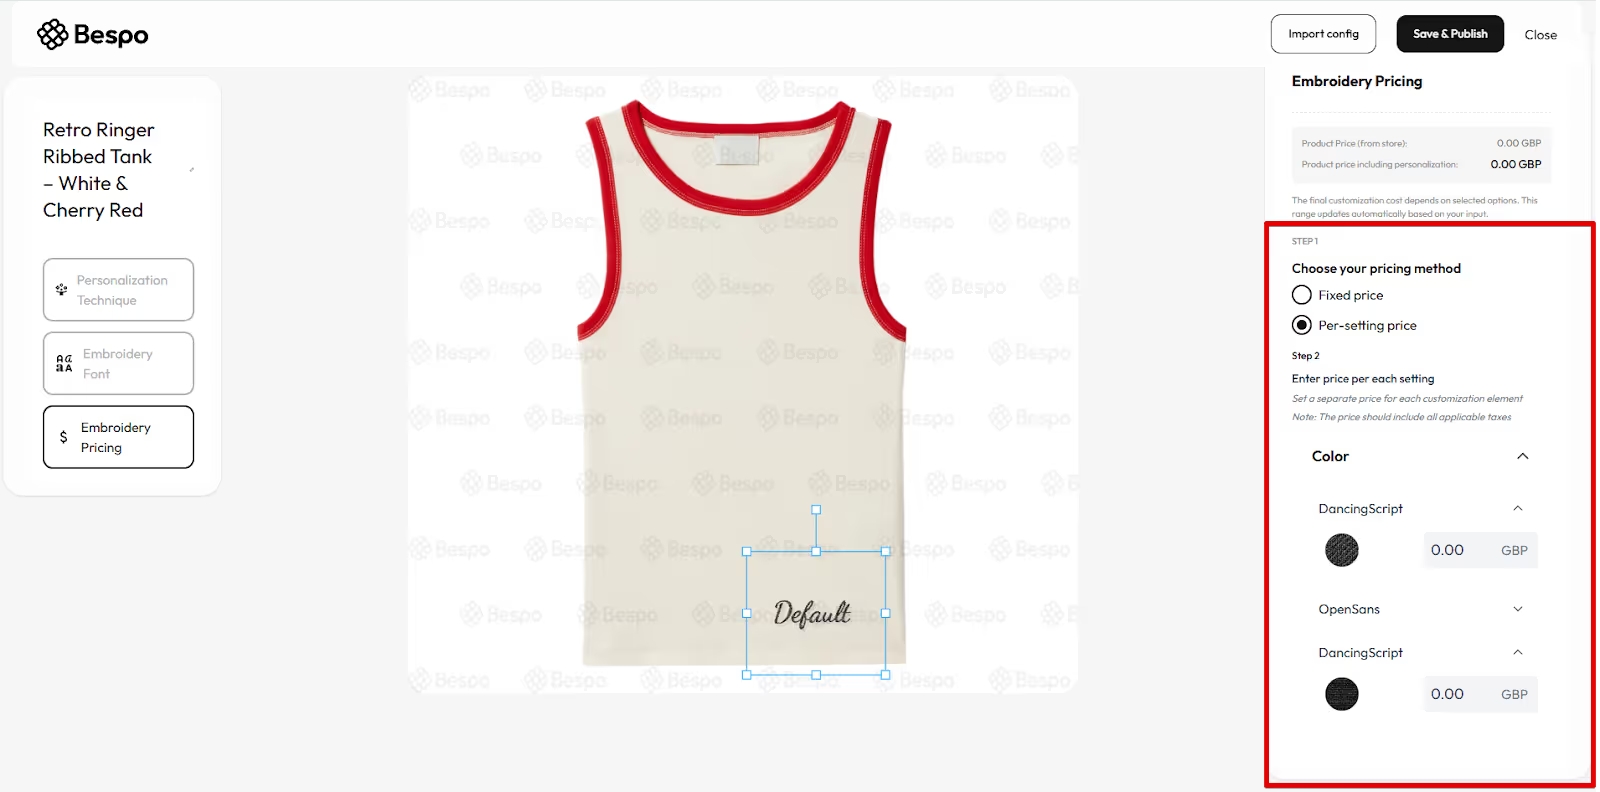
Note: Prices should include applicable taxes.
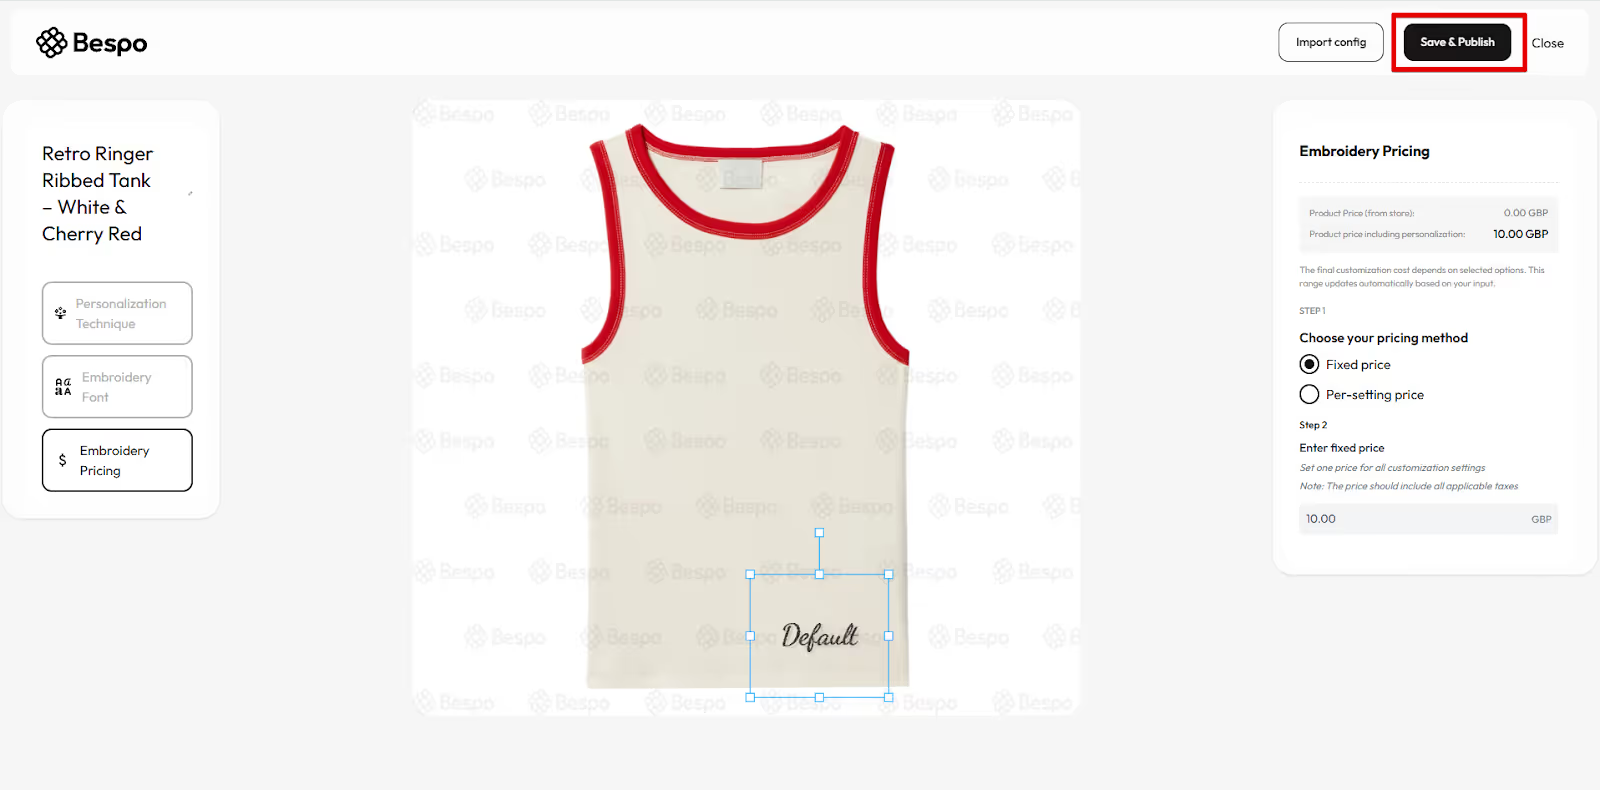
7) Save and publish
Click Save & Publish in the top right to make this product live with personalization.
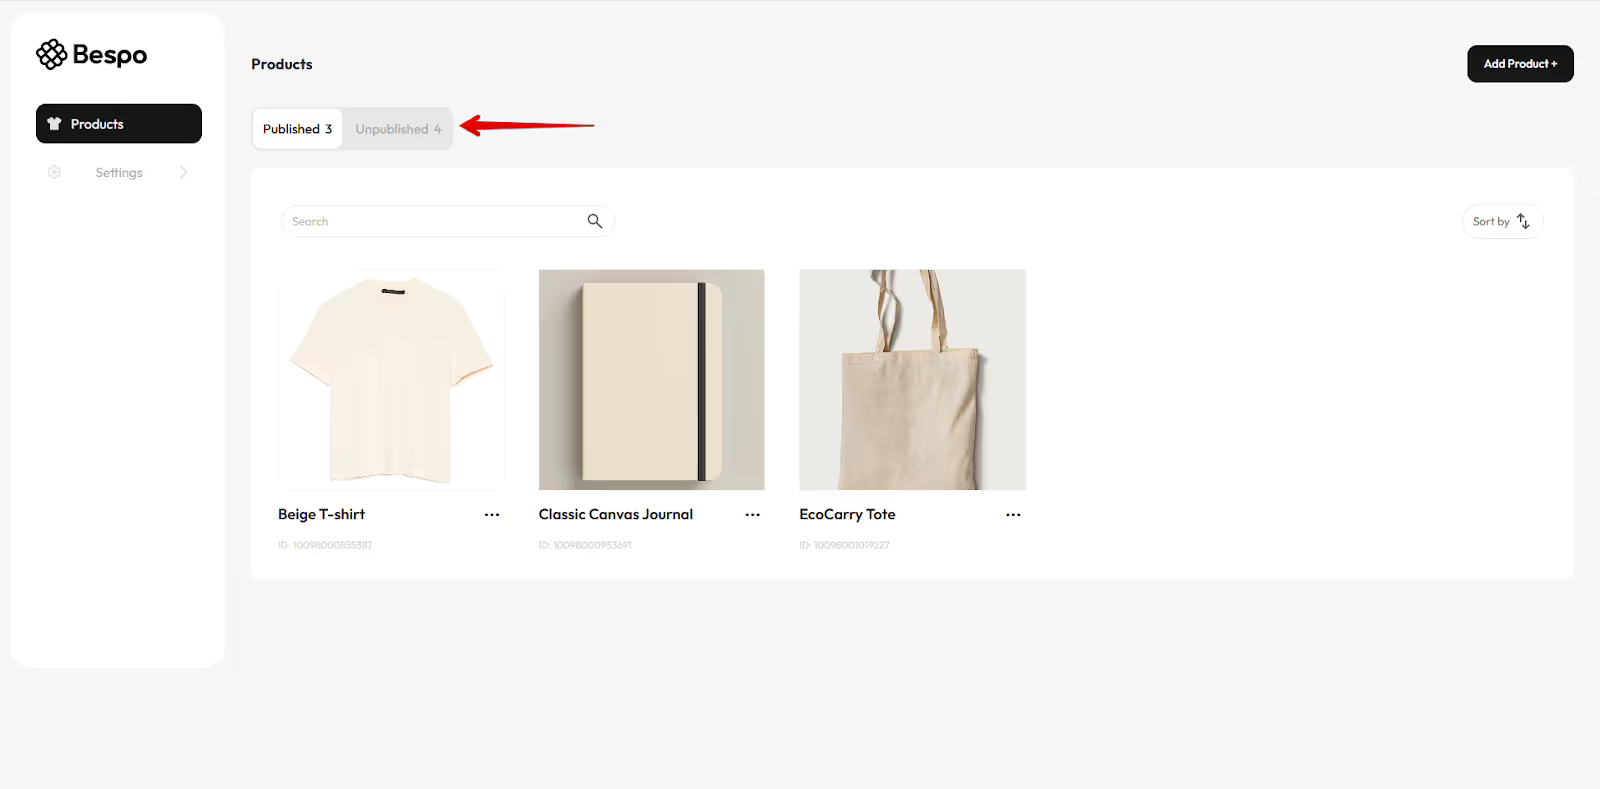
Where to see your product after publishing
After you save your product, the product will not appear in the published tab until you publish it.
Here is how to publish a product:
Use Unpublished to find drafts you have not published yet.
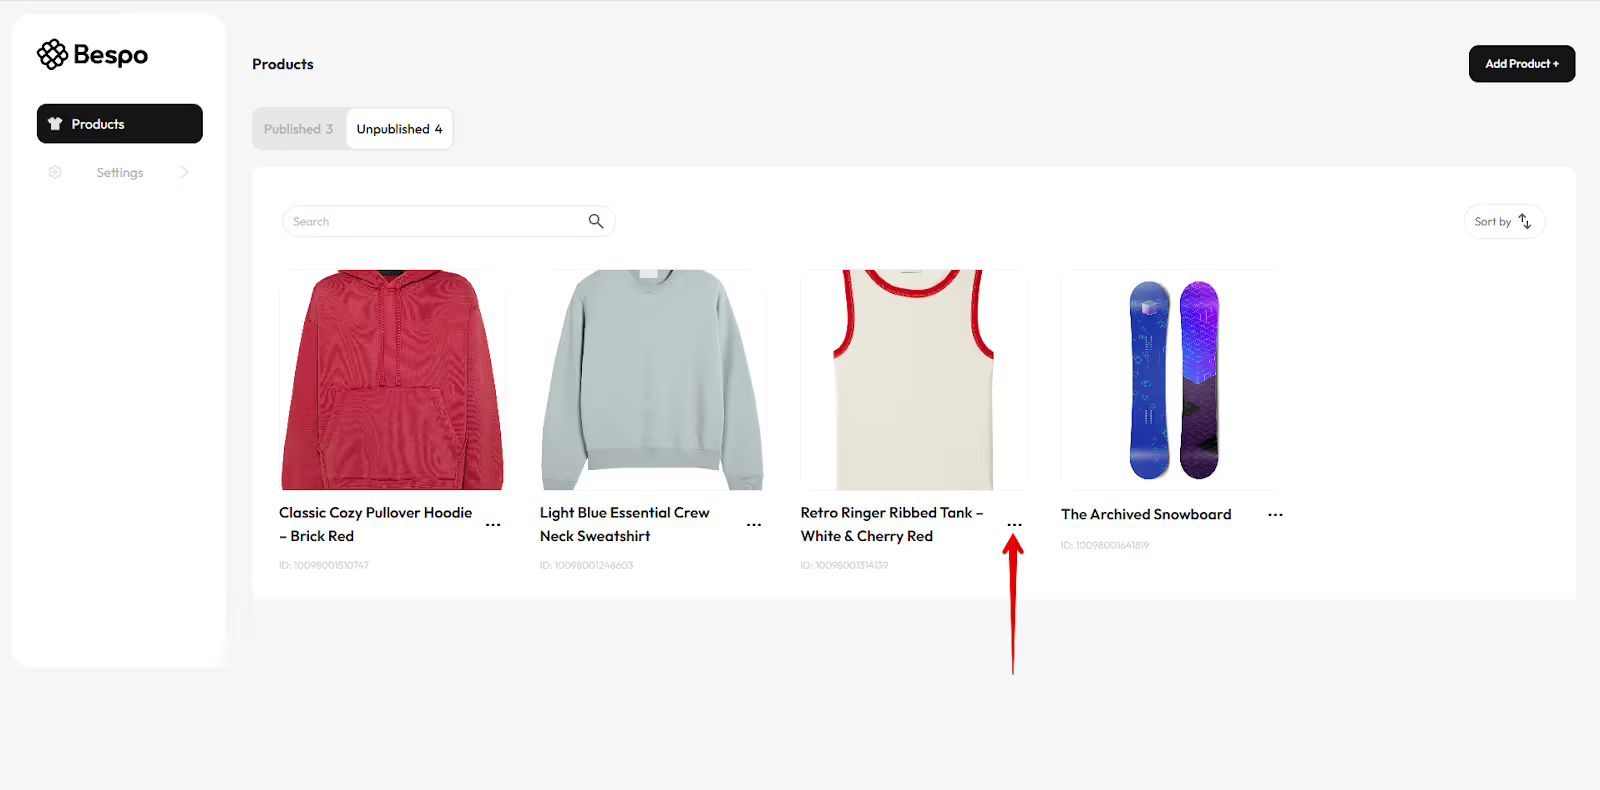
Click the three dots on a product card to access more actions like edit or unpublish.
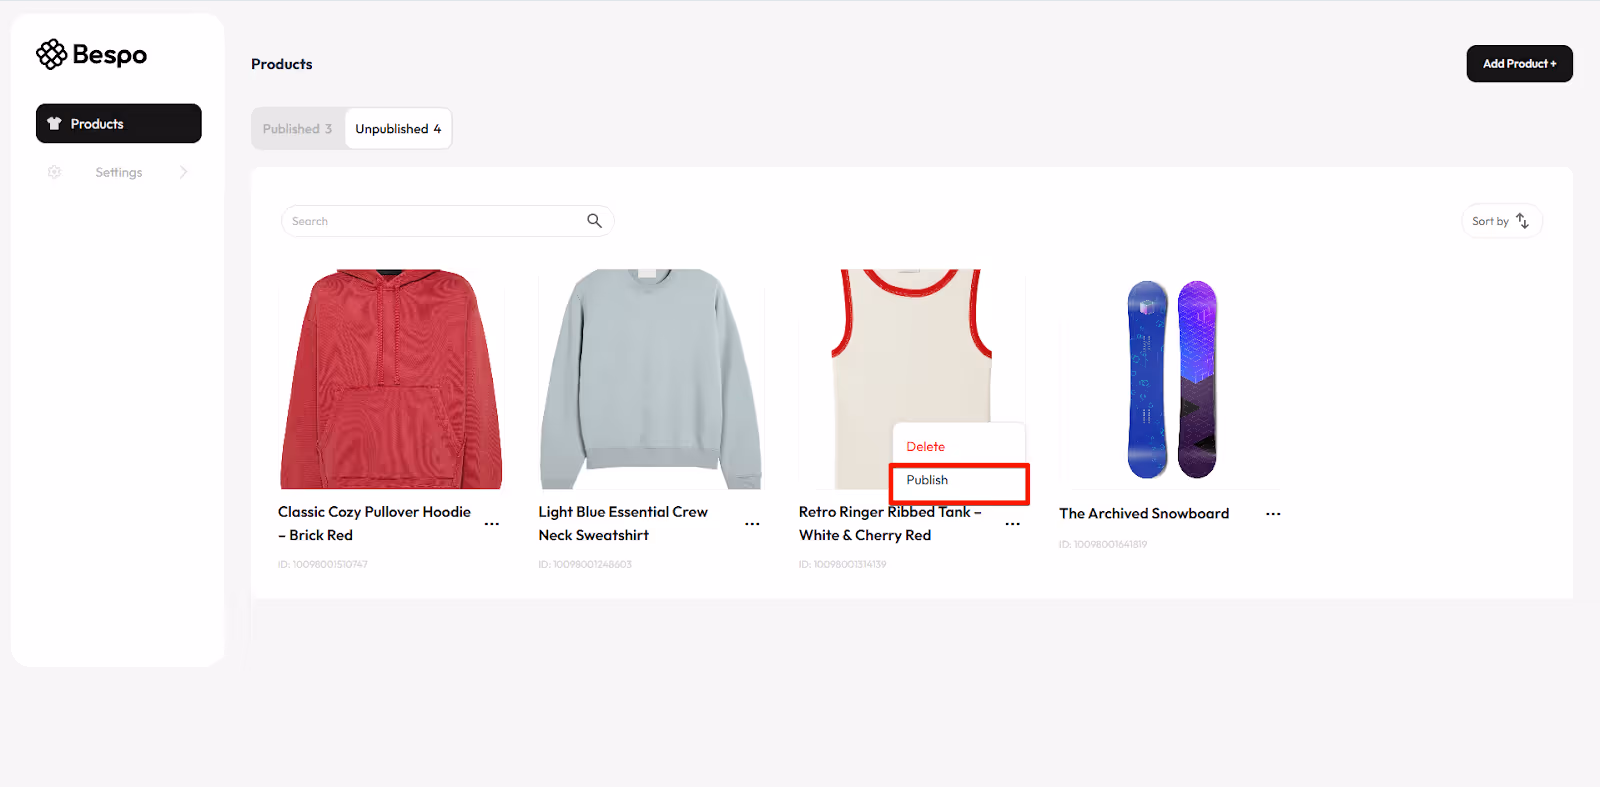
Click Publish
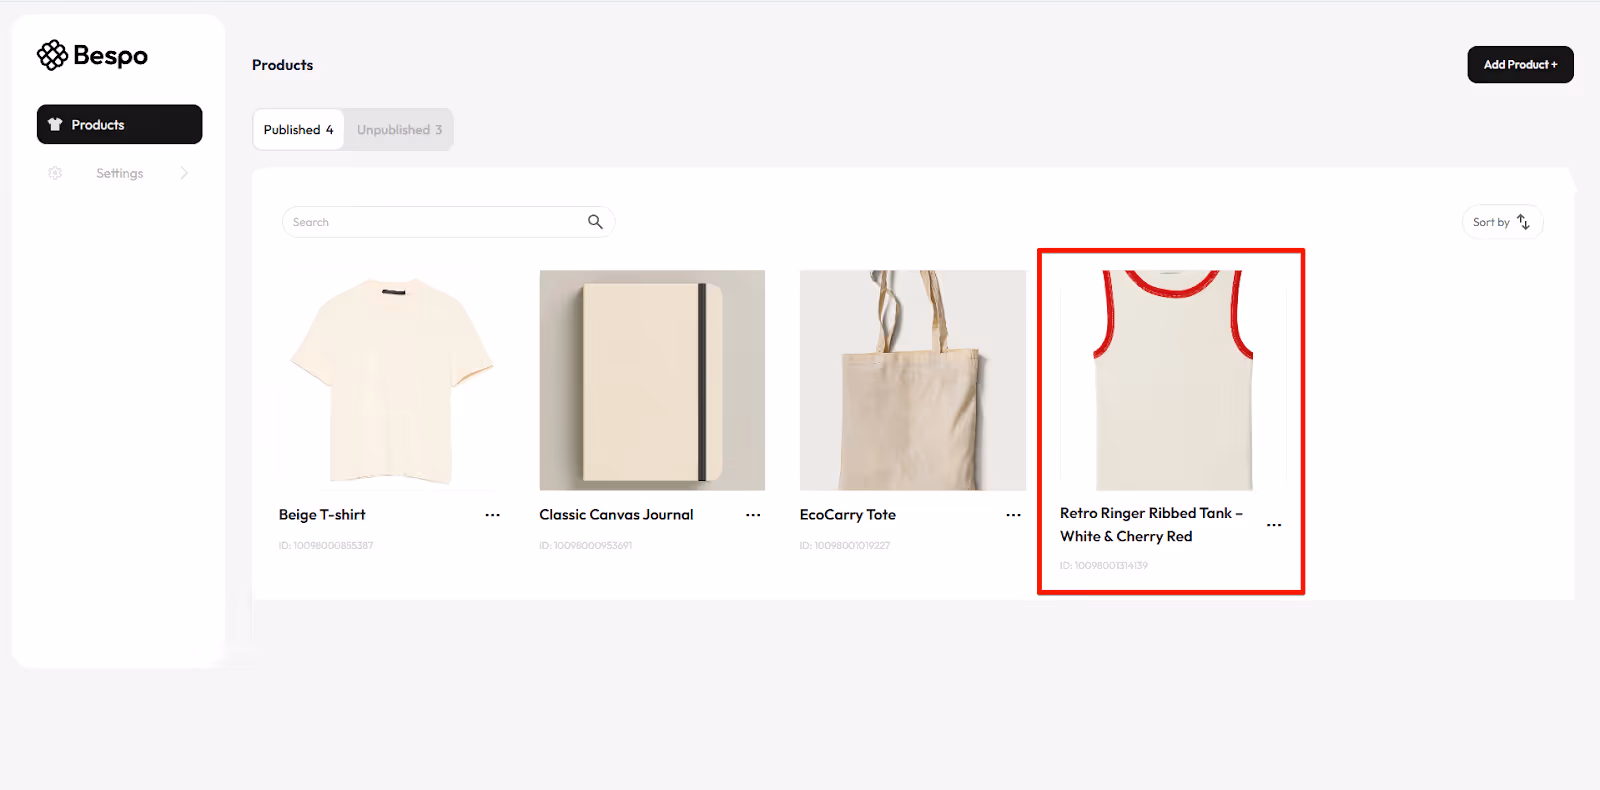
Your product will now appear in the Published section.
Quick tips
- If the preview text looks off, adjust Font Size or move the blue resize handles on the canvas.
- Always click Save & Publish when you are done. Draft changes remain under Unpublished.