How to Install Bespo Product Personalizer on Shopify Store?
Installing Bespo takes a few clicks: open the official app page, install it in your store, pick a plan, and approve billing (trial included). Here’s how to do that step-by-step.
1) Open the official Bespo app page
Make sure you’re on Shopify’s App Store at apps.shopify.com/bespo.
.avif)
2) Click Install
On the Bespo App Store page, click Install.
.avif)
Tip: If you manage multiple stores, Shopify will ask which store to install to. Choose the correct store and continue.
3) Approve app permissions
1. In your Shopify admin, a modal appears showing what Bespo can access (e.g., products, functions).
2. Click Install to continue.
.avif)
4) Select your plan
1. Choose Starter, Pro, or Enterprise
2. Click Select under the plan you want (monthly or yearly).
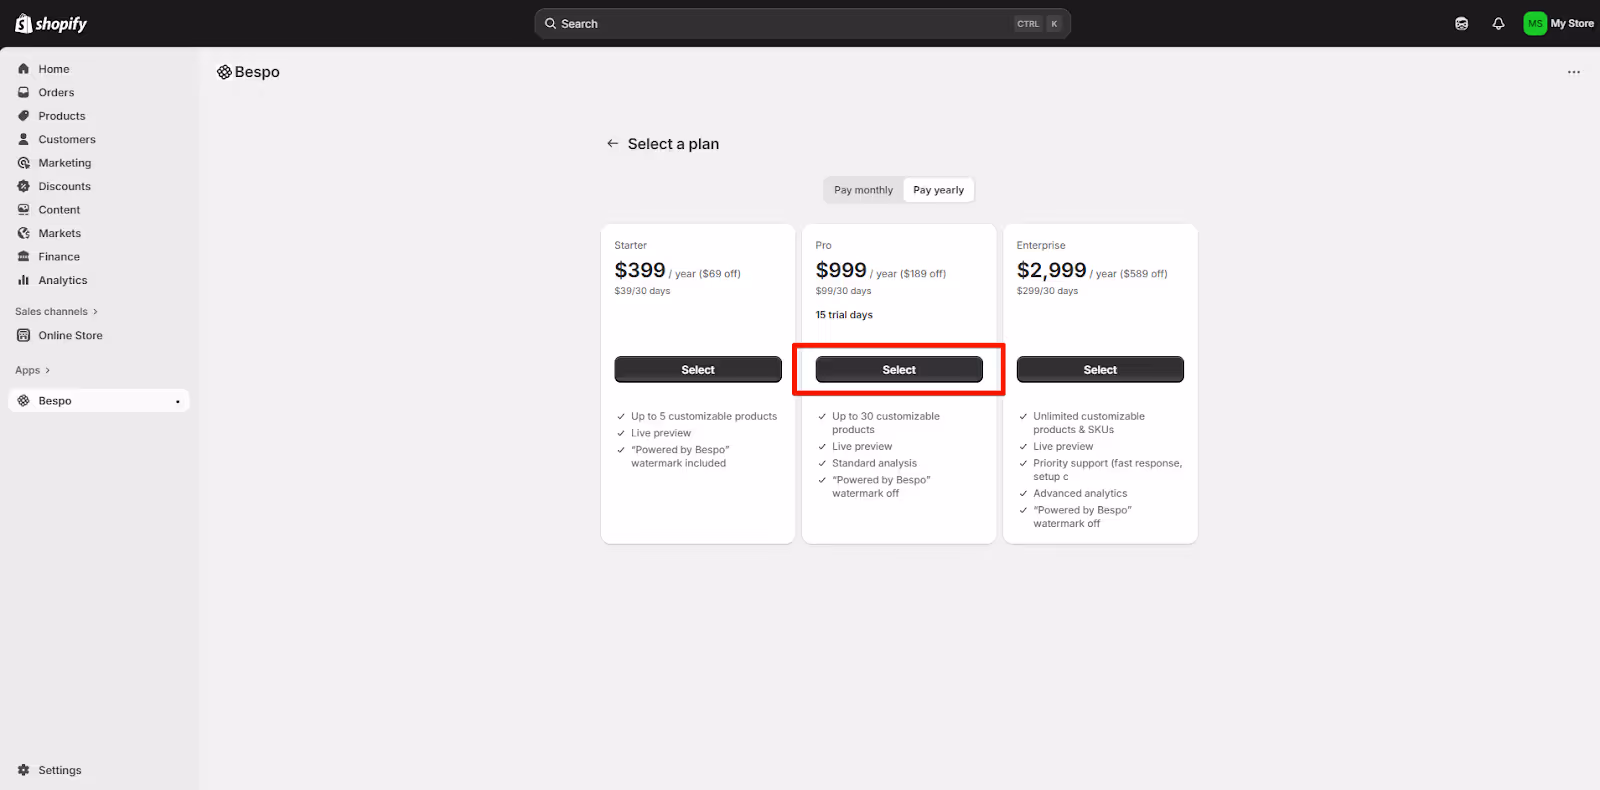
Note: A free trial starts when you approve billing. You can change plans later.
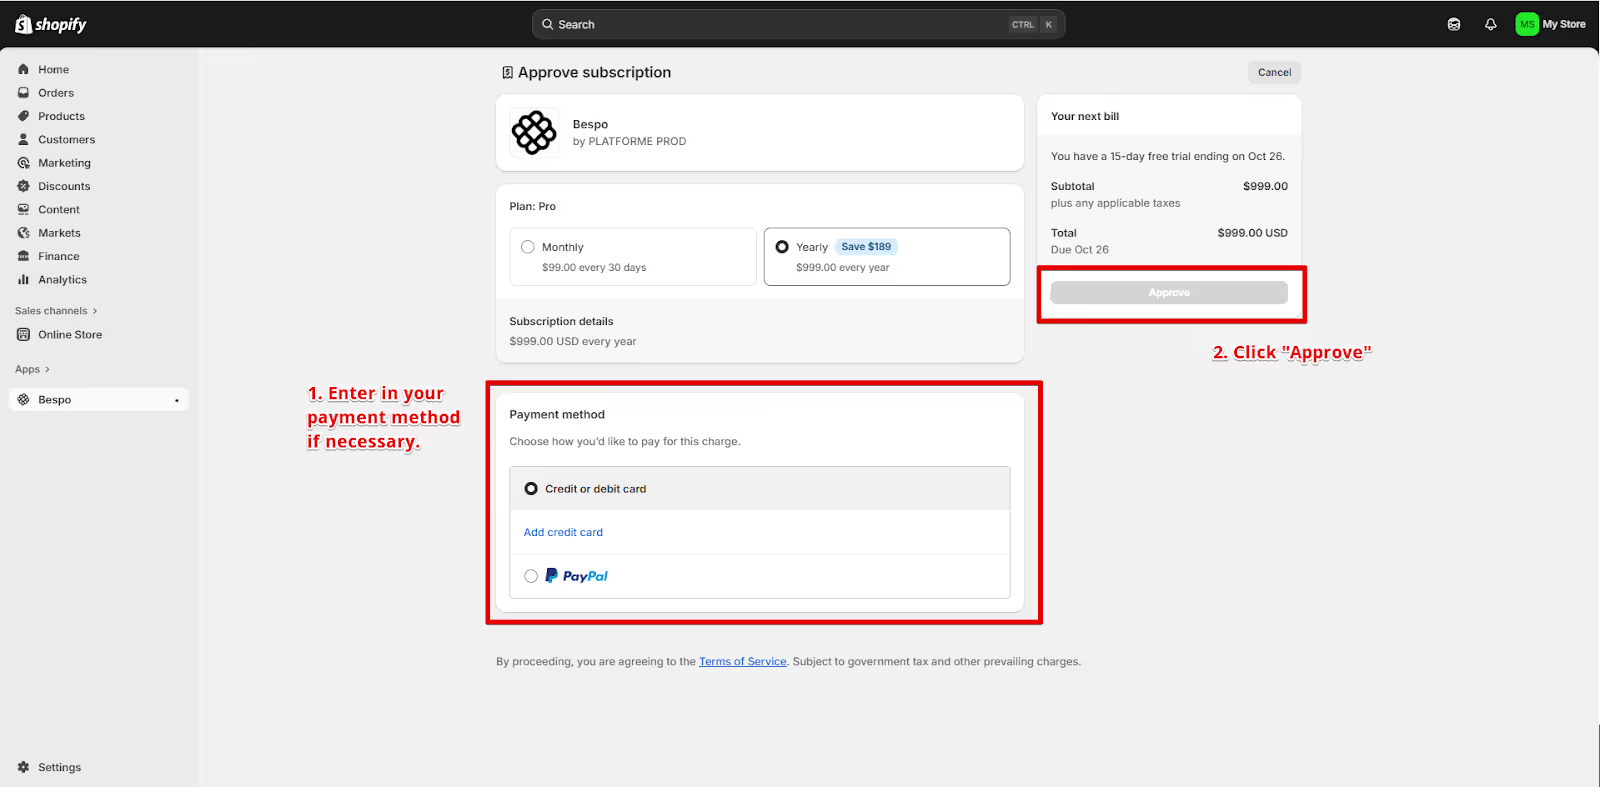
5) Approve subscription
1. Choose Starter, Pro, or Enterprise
2. Click Select under the plan you want (monthly or yearly).
Where to find Bespo after installI
In Shopify, go to Apps and click Bespo
That opens the Bespo dashboard where you can add products and set up personalization.
Link to “How to add and configure a product in Bespo”
Quick troubleshooting
- If the install button redirects you to a login page, log in to Shopify first, then click Install again.
- If the Approve button is greyed out, add a valid payment method.
- Can’t access Bespo in Apps? Refresh your admin or ensure your user has permission to install apps.