How to Create an Embroidery Personalization in Bespo?
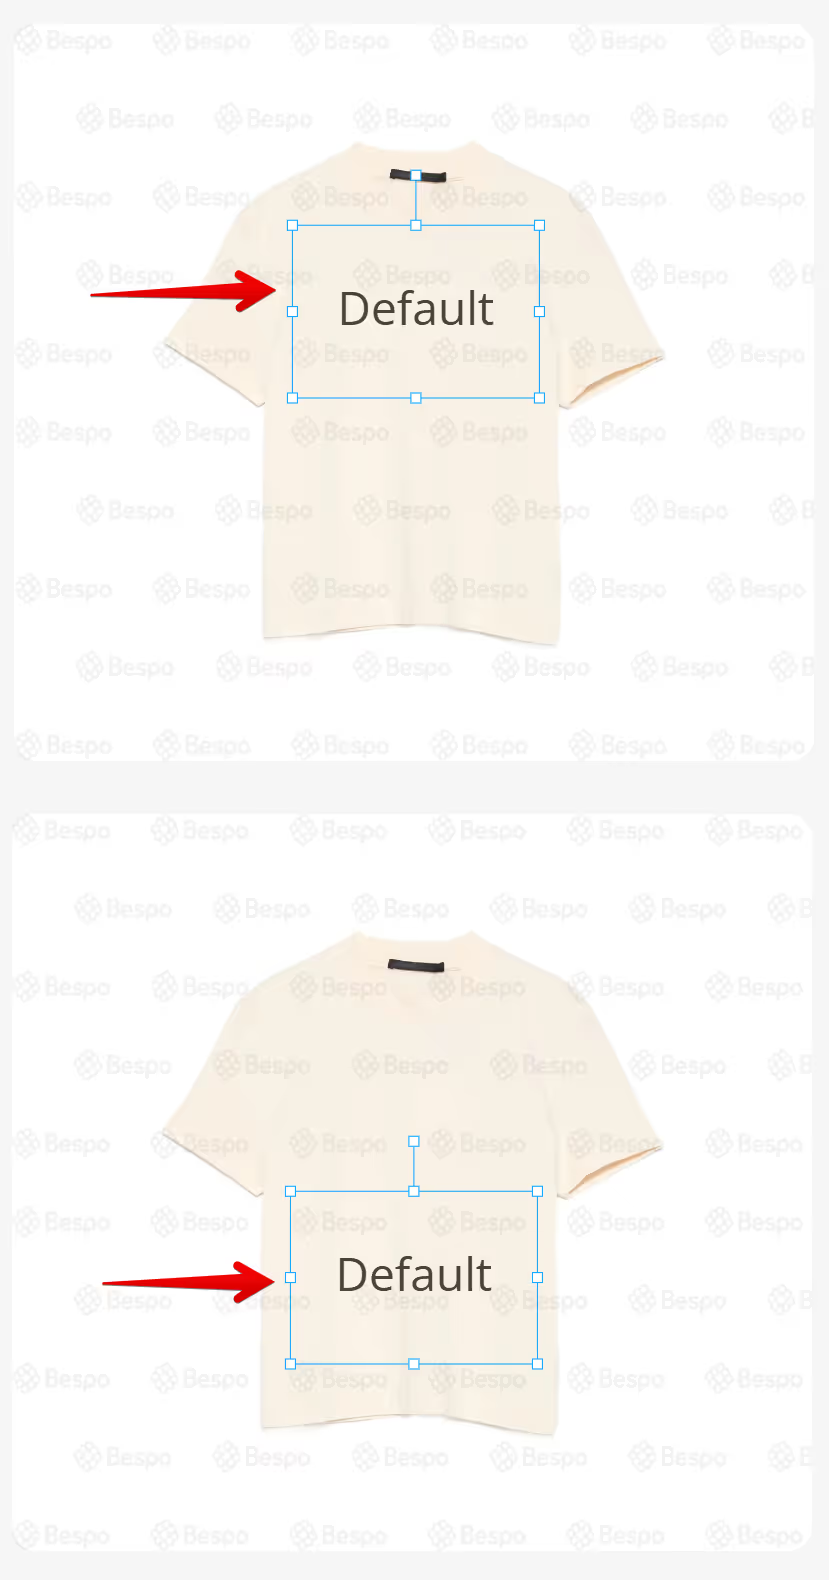
Placing the text box correctly matters because it determines exactly where a shopper’s personalization will be produced on the item. Good placement avoids seams, collars, or edges and keeps the design balanced and readable.
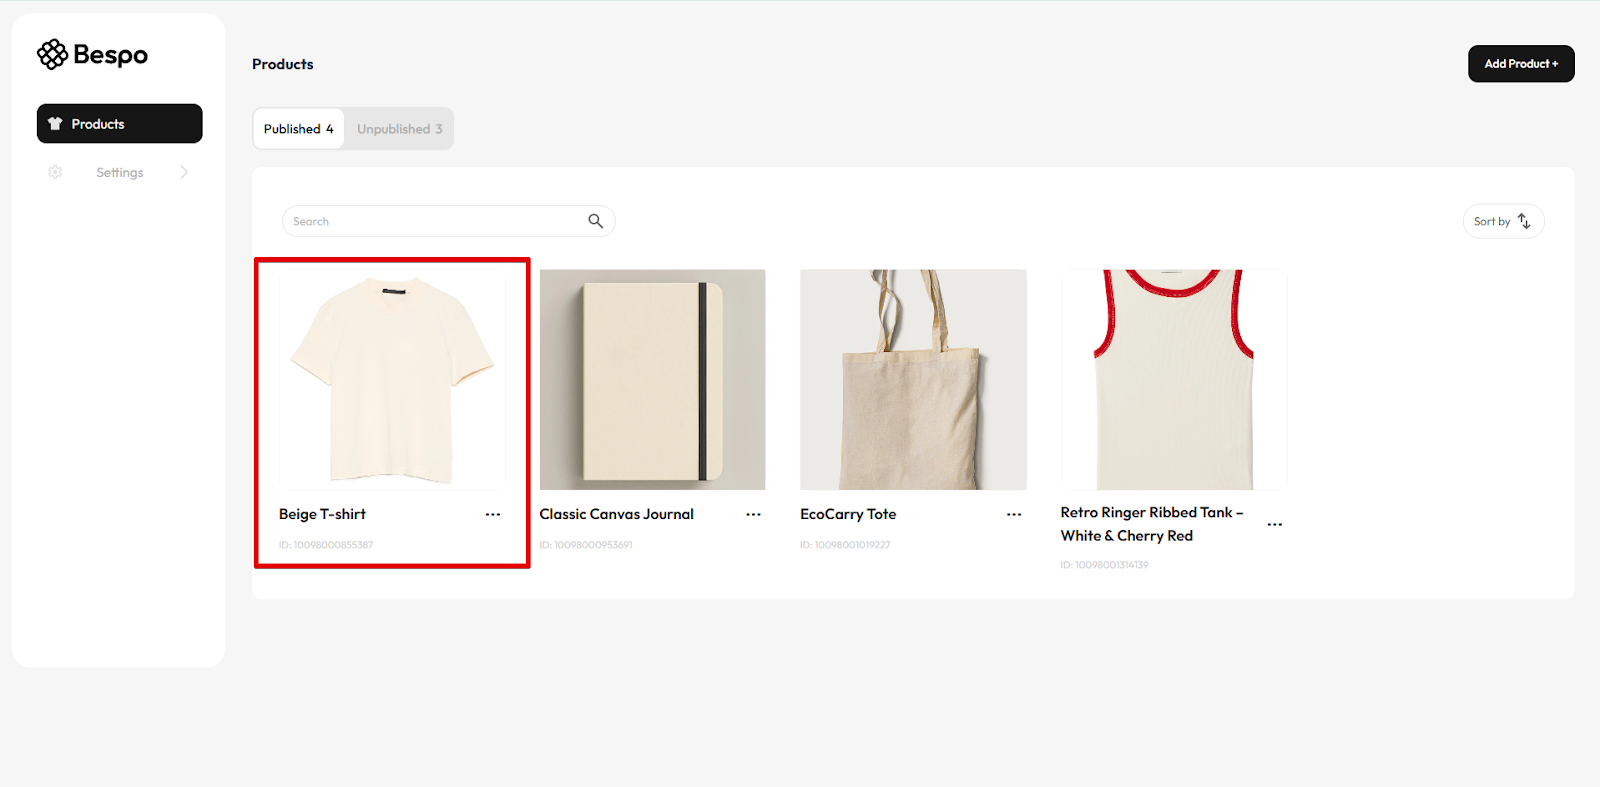
1) Open the product in Bespo
From Products, click the item you want to personalize to open the editor.
2) Select the text box on the canvas
Click anywhere on the sample text so the blue bounding box with handles appears.
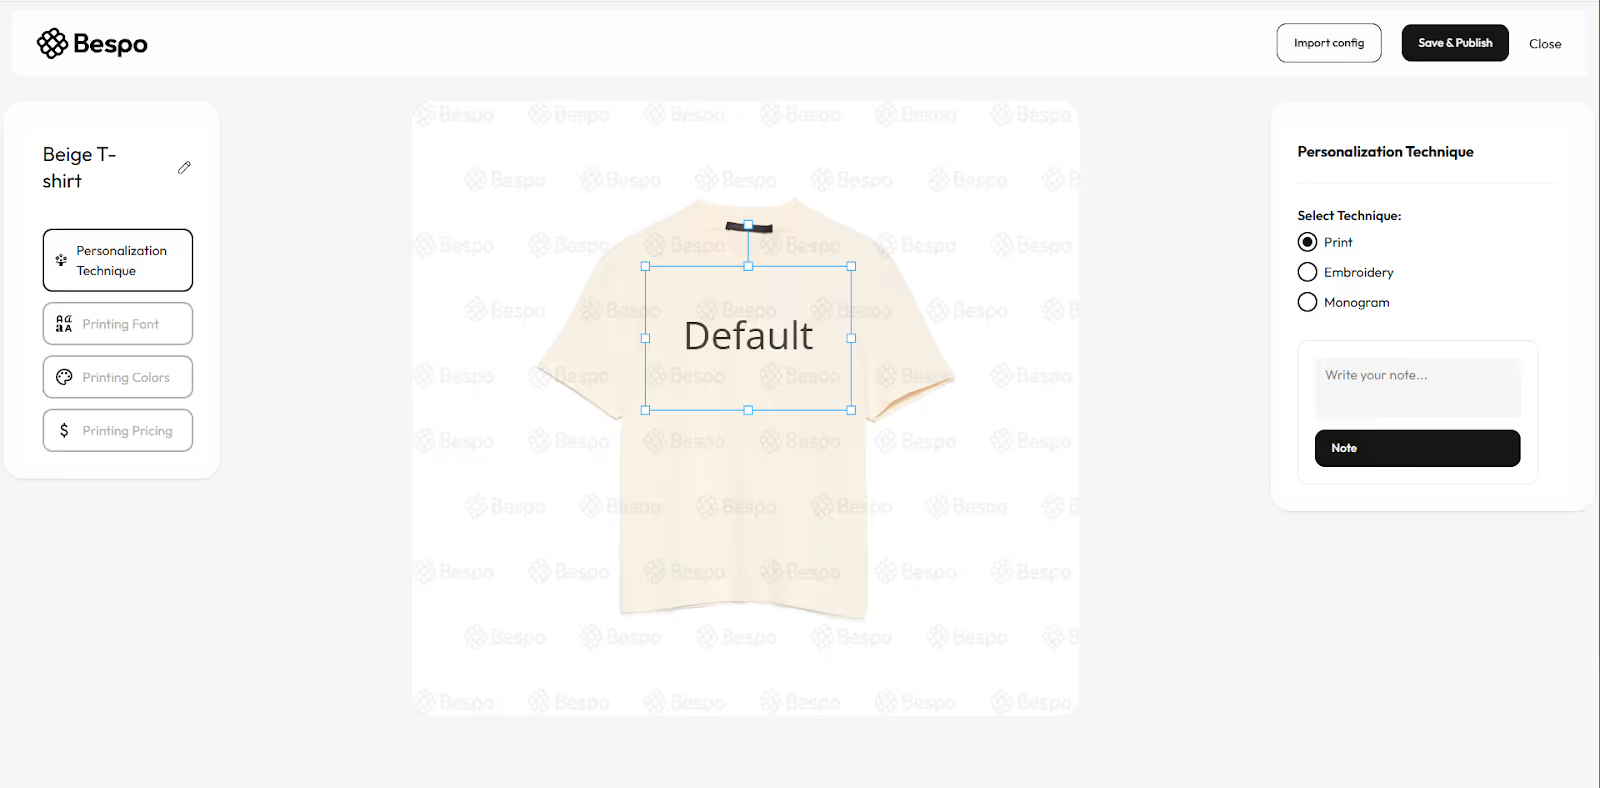
3) Move the text box
Hover inside the blue box until your cursor shows the move/drag icon, then click-and-drag the box to the desired area of the product (e.g., center chest, lower hem).
4) Resize the text box (optional)
Drag a corner handle to make the box larger or smaller.
5) Keep within the safe area
Avoid placing the box on seams, collars, or edges. Leave reasonable margins.
6) Review the live preview
Check that the text looks balanced and readable at the new position. If needed, repeat steps 3–4 to fine-tune.
Tips
- If the text looks too big or small after moving, adjust the Font Size in your font settings, or resize the blue box.
- For consistent placement across sizes, visually align the box using landmarks (center line, equal spacing from neckline/hem).
You can always reopen the product later to tweak placement and Save & Publish again.